This section is currently under construction. Please check back later.
1. The Domain Chunk
Sitecore security domain is a logical unit which provides security services for each Sitecore site. Domains define security entities such as security groups and users and provide security services such as authentication and access rights validation.
Read more about domains in Sitecore.

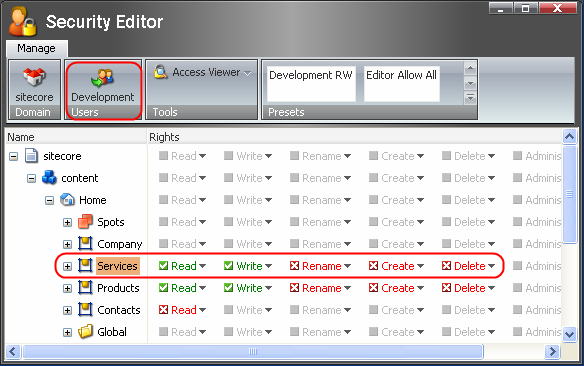
The Domain Chunk allows the user to switch between the Sitecore domains. The chunk indicates the currently active domain. For instance, the image above indicates that the Sitecore domain is active. Select the image of the domain and the following window will appear.
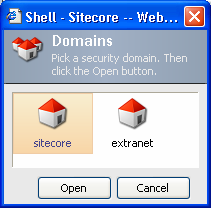
In this window you can choose among the existing domains. Select a domain and click the Open button.
2. The Users Chunk
Sitecore provides personalized access to its clients via User Items. Each User Item is associated with one or more Roles.

Read more about Users in Sitecore.
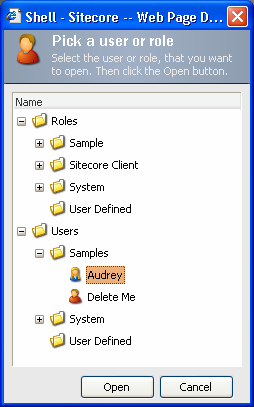
All setting in the Security Editor’s workspace are associated with the currently selected User or Role. The Users Chunk allows the user to change Users and Roles. The chunk indicates the currently selected User or Role, selecting it opens a dialog box for selecting a new User or Role for which the rights are set.
3. The Tools Chunk

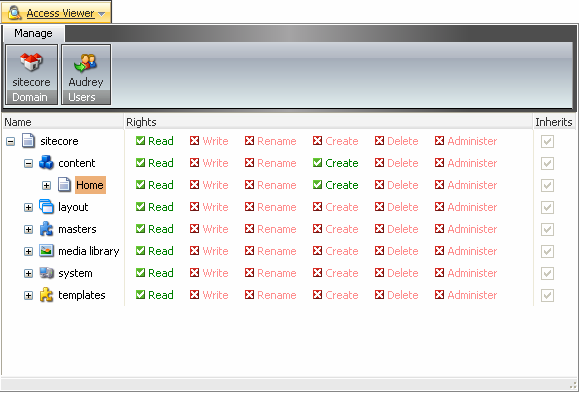
This chunk provides access the Access Viewer. Selecting the Access Viewer title opens the Access Viewer application in the drop-down window.
4. The Presets Chunk
Imagine a situation when you need to allow read and write access and deny all other rights on a number of Items. In this case the Presets chunk will come in handy for you. It allows to specify similar access right sets on different items with a single click.

The presets can be customized by configuring Items under sitecore/system/Settings/Security/Presets. The presets can affect single users or roles.
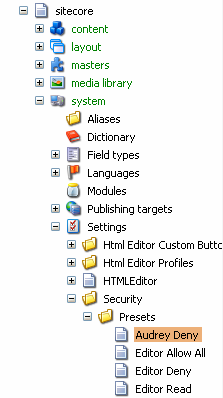
Take a look at the example below:
Say, we need to set specific rights for developers on a number of items. The rights should be as below:
Read, Write – allowed; Rename, Create, Delete – denied.
To accomplish this task you just should create the appropriate preset and use it.
Creating the Preset
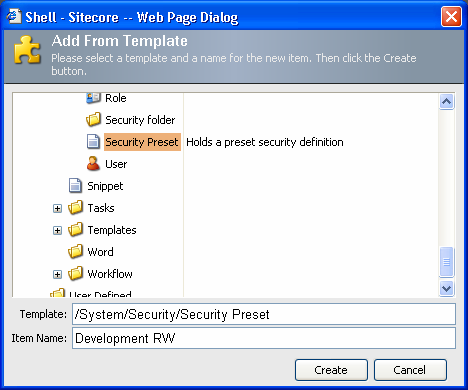
Navigate to sitecore/system/Settings/Security/Presets and create the new preset based on the Security Preset template located under templates/System/Security.
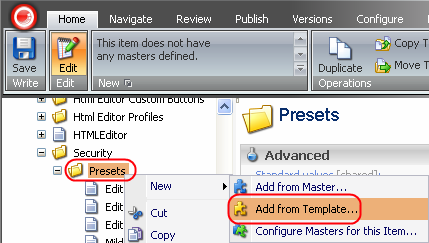
Call the preset Development RW. Click Create.
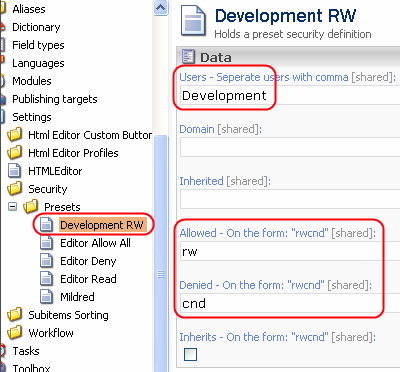
In the Users field, type in the user names separated with comma or the role names. The settings will be applied to the users or roles specified here.
In the Allowed and Denied fields, enter the abbreviations of the appropriate rights: r – Read, w – Write, c – Create, n – Rename, d – Delete.
Save the Preset.
In order to test the preset, do the following:
-
Choose an item in the Security Editor and select the Development RW preset in the Presets chunk.
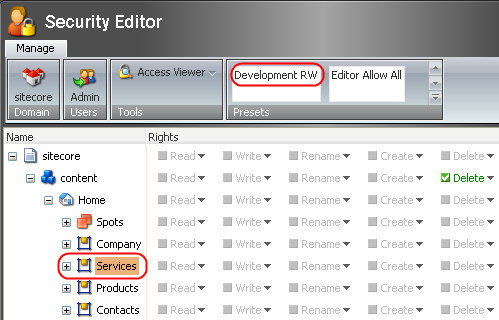
The preset will execute regardless of which user or role is currently active.
-
S
tart the Access Viewer and select the Development role. You will see that the access rights are set as defined by the preset.
